I’ll show you how to shape an invite around your artwork and make the RSVP useful before guests start asking follow-up questions.
Mateo IrvingReviewer · published Nov 8, 2026 · 6 min read
011. Build the invite around your own artwork
The practice schedule is set, but the team party invite still looks like every other gathering. In Invitation Maker, start with the option to upload your own design rather than forcing your artwork into a fixed template. The app’s new upload feature supports different shapes and ratios, building the invite around the image instead of cropping it to fit.
This is useful when you already have a team graphic, a hand-drawn birthday card, or a design made for a particular screen shape. Choose artwork with the important information away from the edges, then add the event wording in the app. I’d keep the image as the visual anchor and let the text do the practical work.
Check the finished card at the size you expect people to view it. A detail that looks clear on a large screen can disappear in a phone message preview. This matters most when the artwork has small lettering or a busy background; if the event details compete with it, simplify the wording before sharing.
022. Put the RSVP to work before sending
When I’m coordinating a group, a bare yes-or-no reply creates another round of messages: people ask where to park, what to wear, or what to bring. Add those details to the RSVP invitation itself, using the extra event-detail options for dress code, parking, and gift information. Guests can find the answer while they’re deciding whether they can come.
Write each detail as a short instruction, not a paragraph. For parking, name the relevant entrance or lot if you know it. For clothing, say what the occasion calls for. Gift information should be clear enough to prevent guesswork. I’d put the detail guests need before they answer ahead of optional context.
This is especially handy for a venue with limited parking or a gathering where guests may arrive from different places. It also helps when you’re organizing event tickets or a group outing: put the useful logistics alongside the invitation so the RSVP conversation stays focused on attendance.
A beautiful card can still leave guests scrolling back through a chat to find the start time. When customizing the invitation, give the event date, time, and location their own clear lines rather than tucking them into a greeting. I’d check that a guest can spot those three facts at a glance before they open the full message.
If the event has a second important time—such as when doors open or when food is served—label it so it cannot be mistaken for the start time. For a shared meal, add whether the plan is takeout or a sit-down gathering in the event details. That small distinction can head off a lot of practical questions.
Review the wording as if you had never heard about the event. Avoid shorthand that only your family or team understands, and spell out an unfamiliar venue name. This check pays off when the invitation is forwarded to someone who was not part of the original planning.
044. Use the Comment Wall for messages, not logistics
The new Comment Wall gives guests a place to leave messages and good wishes right on the invitation. That makes it a natural home for a birthday note or a quick congratulations, rather than another group chat that gets buried under planning chatter. If you want guests to use it, say so in the invitation with a simple prompt.
I’d keep decisions that affect everyone—arrival time, parking, or what to bring—in the event details instead. Comments are better for personal replies and small bits of conversation. Separating the two means a guest does not have to sift through well-wishes to find the answer to a practical question.
This works particularly well for celebrations where several guests may want to leave a note. It is less useful as the only way to collect an important response: make the RSVP itself clear, then let the Comment Wall add a social touch.
055. Choose the template for the message, not just the mood
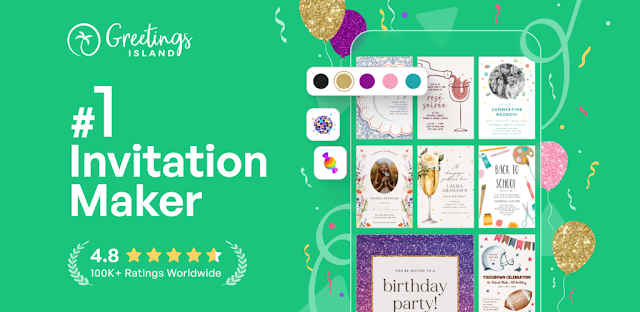
When you browse the available designs, settle the occasion and the amount of information first. A formal dinner may need room for venue and dress details; a casual team get-together needs a quick, readable announcement. Greetings Island offers designs for many occasions, so I’d narrow my choice by asking what guests must understand, not just which colors I like.
Then customize the text, colors, and photos to fit the event. Keep contrast strong enough for phone screens, and avoid placing a photo behind the most important wording if it makes the text hard to read. If the design feels crowded, remove decoration or shorten the greeting before shrinking the event information.
This approach is useful when you’re sending an invitation through email or social media, where people may first see it as a small preview. The card should communicate the occasion and the key action even before someone stops to admire the design.
066. Do one guest-view check before sharing
Before sending the digital card, read it once from the guest’s point of view: What is happening, when is it, where is it, and how do I RSVP? I use that checklist when I’m arranging practices, because a missing detail can turn a simple plan into a string of clarifying messages. Fix the wording while the invite is still in your hands.
Next, check that the RSVP extras match the event. A dress code, parking note, or gift detail helps when it answers a likely question; unnecessary instructions make the invitation feel like a form to complete. For a restaurant gathering, for example, include the relevant arrival or reservation detail rather than a general note about the venue.
Once the card reads cleanly, share it by email or social media. Keep the message accompanying it brief and point guests toward the RSVP. That final check pays off when the invitation reaches people who need the essential details without asking you to explain them separately.
The takeaway
Start with your artwork or a design that suits the occasion, then make the RSVP carry the practical details guests will ask for. Check the finished card on a phone before sharing it.
For more help choosing and using the app, continue to my Invitation Maker page just below.
The Considered Pick is independent and not affiliated with Greetings Island. This guide reflects the reviewer's own setup; menus can differ by device and version.
 Best picksMy Location
 TipsCurrency converter offline
 TroubleshootingCode Studio

 TipsDenny's

 How-toRemote Control for Rоku &
 CompareGps Map Navigation &

 TipsGmail

 How-toThe Official MTA App

 Tipsearnify

 TipsCamera Translator

 How-toPixVerse